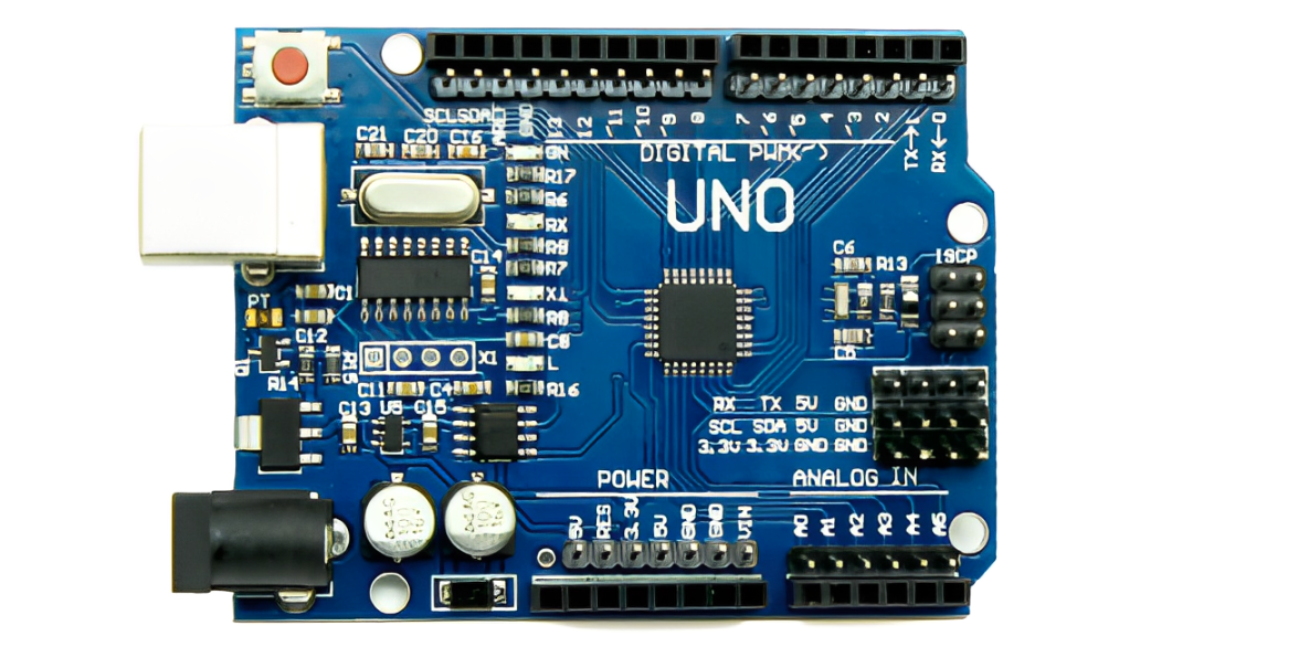
The Arduino Uno R3: A Beginner-Friendly Introduction
The Arduino Uno R3 is a popular open-source microcontroller board that has become a staple for hobbyists, students, and professionals alike. Its ease of use, affordability, and vast community support make it an excellent platform for learning electronics and programming.
Key Features:
- Microcontroller: Powered by the ATmega328P microcontroller, offering 32KB of Flash memory and 2KB of SRAM.
- USB Connectivity: Equipped with a USB-to-serial converter (CH340G) for easy communication with a computer.
- Digital and Analog Pins: Features 14 digital input/output pins and 6 analog input pins, providing ample flexibility for various projects.
- Power Supply Options: Can be powered by an external power supply (7-12V) or via the USB connection.
- Breadboard-Friendly: Designed with a breadboard-compatible layout for easy prototyping.
- Open-Source Software: Utilizes the Arduino IDE, a user-friendly integrated development environment (IDE) with a large community and abundant resources.
What Can You Do with an Arduino Uno R3?
The possibilities with an Arduino Uno R3 are virtually limitless. Here are a few examples:
- Robotics: Control motors, sensors, and actuators to build robots that can move, interact with the environment, and perform tasks.
- Home Automation: Create smart home devices such as automated lighting systems, temperature controllers, and security systems.
- Data Logging: Collect and analyze sensor data, such as temperature, humidity, and light intensity.
- Interactive Art: Build interactive art installations that respond to user input or environmental conditions.
- Wearables: Develop wearable devices such as fitness trackers, health monitors, and even musical instruments.
- Educational Projects: Use it in educational settings to teach electronics, programming, and problem-solving skills.
Getting Started with Arduino Uno R3:
- Obtain the necessary hardware and software: Purchase an Arduino Uno R3 board and install the Arduino IDE from the official website.
- Connect the board to your computer: Use a USB cable to connect the board to your computer.
- Write and upload code: Use the Arduino IDE to write your code, compile it, and upload it to the board.
- Experiment and learn: Start with simple projects and gradually increase the complexity as you gain experience.
Resources and Community:
The Arduino community is vast and supportive. You can find numerous tutorials, examples, and libraries online. The official Arduino website, forums, and social media groups are excellent resources for learning and getting help.
Conclusion:
The Arduino Uno R3 is a versatile and accessible platform for anyone interested in electronics and programming. Its ease of use, affordability, and extensive community support make it an ideal choice for beginners and experienced users alike. With a little creativity and dedication, you can use the Arduino Uno R3 to bring your electronic and robotic ideas to life.

